Article brief on reducing file size and/or video resolution for ClassVR compatibility.
CVR-155-A / CVR-255 / CVR-255-64 / CVR-355-128 (Xplorer) / CVR-655-128 (Xcelerate)
Within the ClassVR portal you have the ability to upload your own custom content, this however comes with certain requirements as the devices were designed specifically to support our own content. However, by following these guidelines you should be able to upload and create tracks and playlists using your own content with minimal issues.
Further details regarding the uploading of content can be found in this article : Uploading custom content
NOTE : The ClassVR headsets may had varying amounts of free space available dependant on use. You can check the current space available in your device list in the Administration portal. You can also clear the current cached content by following this article : Clearing the Cache
Basic Recommendations
For CVR1 (Generation One) series devices, the resolution of the video should not exceed 1920x1080 @ 30 FPS. Supported codec formats are H264 in an MP4 container . Other codecs and containers are supported but may cause issues.
For CVR2 (Generation Two & Three) series devices, the resolution of the video should not exceed 3840x1920 @ 60 FPS. Supported codec formats are H264 and H265 in an MP4 container. Other codecs and containers are supported but may cause issues.
Video example: Resolution
A video that is 4096x2048@60FPS, which is just above what the CVR2 can decode also usually has a very high bitrate which might cause decoding problems, but certainly leads to large file sizes.
A video that is 5376x2688@30FPS is certainly to high for what the headsets can decode.
Conversion (Advanced)
If you want to try fixing it yourself we recommend using the opensource command line tool ffmpeg [ Download from our Avantis secure server ] and running ffprobe (optional) on the video to see the format, resolution, and bitrate. If it is over resolution, for example, you can transcode it using the following command:
ffmpeg -i #VIDEO#.mp4 -c:v libx265 -crf 28 -tag:v hvc1 -vf scale="'min(3840,iw)':-2" -c:a copy #VIDEO#_x265_crf28.mp4
This scales the video to 3840 pixels horizontally while retaining the aspect ration. It uses the h265 codec, which is more efficient than h264. It uses CRF to try adjust the bitrate to a target quality level (28 in this case), but it also applies an upper limit of 20mbps to the stream to avoid saturating the GPU and to reduce the overall file size. Finally it copies the audio which is an area you could make more savings given the limited speaker sound quality on the headset.
- Unpack the downloaded file to a location on your computer
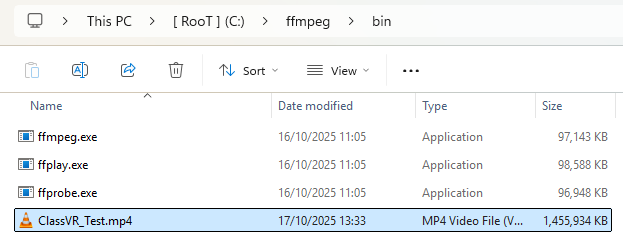
- Go to the /bin folder where you can see 'ffmpeg.exe'
- Copy your video you want to convert into this folder
- Copy the path to this folder from your address bar
- Open 'Command Prompt' 'CMD' from your start menu
- Type cd / and hit return to the root of your drive
- Type cd (then right click anywhere in the window to paste the path to the file) and hit return
You should now see a flashing cursor and your path to the file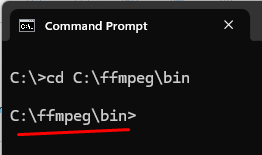
- Copy the appropriate command form above and edit in notepad or something similar and update with the name of the video you are trying to convert.
Make sure you replace the '#VIDEO#' text in both locations with your file name.
- Hit return and you should see a timer start at the bottom while it converts the video.

Depending on the size of your video this could take up to 20 minutes for a video that is over 2GB. Once completed it will output a report and the final video should be in the folder location.
NOTE : Any specific app issue will need to be directed to the developer or any service or app that is used and we cannot provide any application support of this nature.
This command version reduces the CRF factor by 6 to increase quality. It roughly doubles the file size for every 6 points of CRF/
ffmpeg -i #VIDEO#.mp4 -c:v libx265 -crf 22 -tag:v hvc1 -vf scale="'min(3840,iw)':-2" -c:a copy #VIDEO#_x265_crf22.mp4
This command will limit the output and transcode only the first 10 seconds to make experimenting quicker.
ffmpeg -i #VIDEO#.mp4 -c:v libx265 -crf 28 -tag:v hvc1 -vf scale="'min(3840,iw)':-2" -c:a copy -t 10 #VIDEO#_x265_crf28_10s.mp4
Alternative online free and paid Apps can be found that may suit your requirements. Although we cannot recommend anything specific it may be worth seeking advice from your camera providers website for conversion tools.
More information on CRF : [ https://trac.ffmpeg.org/wiki/Encode/H.265#ConstantRateFactorCRF ]
Custom Video FAQ
I've uploaded my video and sent to the devices but I only hear Audio and have a black screen.
This is a common issue for 360 where the Codec, resolution or Bitrate is not supported by the browser or device. Please follow the recommended settings or convert your current video to resolve this issue.
The video upload keeps timing out and failing to upload.
Upload via the portal is managed by HTTP / HTTPS and there may be local restrictions on file size or TTL (Time To Live) functions via the browser. Try reducing your file size, using an alternative browser or WiFi connection. If you continue to experience issues then please contact our Support Team.
The video uploaded is distorted or displaying as an incorrect format?
All videos can be tagged to determine the format required if it’s not automatically detected. For further help please refer to our article here : Uploading custom content
I've uploaded videos but other teachers are unable to see or use the videos.
Make sure you either share the playlist containing your custom video with your Org or School so they can access this directly, or you can upload the file to the ‘Shared Cloud’ so that teachers are able to use this in their own playlists.